

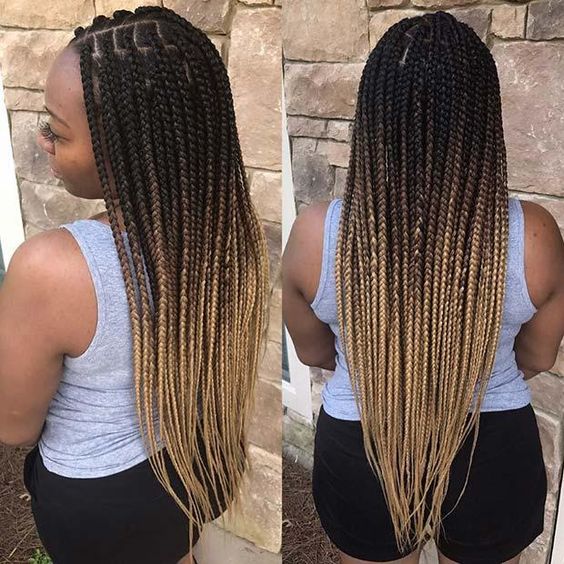
Ombre Box Braids
The concept of box braids have been around for awhile now. Over the last few decades or so people who frequently wore braids or just like to change up their style have gotten really creative. Before the synthetic and human hair manufacturers jumped on the bandwagon, hairstylist and hair enthusiast let their creative juices flow, mixing a natural colored pack of braiding hair with another color, sometimes brighter to create their very own ombre effect. Nowadays it’s a lot easier, instead of taking those extra steps you can just march right into your local beauty supply store and grab and already ombre pack of hair of the shelf.
1How To Ombre Box Braids – Tools for the task

All you need to know is how to be able to add braiding hair to your head, and with different methods for all skill ranges you can definitely find one that will work for you. If you are ever in doubt always seek help from a professional hair stylist. Below we will cover the items needed for this task: Rat Tail Comb, Hydrating hair cream (one that is designed for braids), Hair Gel, 12 – 24* packs of synthetic or human braiding hair (Kanekalon is more commonly used), Rubber Bands, preferably black or clear (optional), Crochet hook, Argan or Coconut Oil, Leave in conditioner, Edge Control.
2Prepping & Installation
To start, your hair will need to be freshly washed, moisturized and blown out. It is not recommended to do box braids on wet hair, you need as much grip on your natural hair as possible and your overall style much neater. Once your hair is cleaned, be sure to moisturize it before blow drying, you can opt for a hair oil like argan oil or coconut oil for this step. Once your hair is completely dry you will then want to apply your hydrating hair cream all over your head, paying special attention to your ends. Then you can choose which of the following methods you want, depending on your skill level, to begin parting your hair. Traditionally box braids are parted in squares, but part your hair depending on how you want and the size of the braids you would like to achieve. If you want thicker braids your parts should be thick as well. Smaller braids, also known as 300s, should be parted about an inch threw out your head, and your edges should be parted half an inch to appear fuller.
Methods to starting box braids
3Rubber Band Method #1
- Part your hair, based on the size of your braids and type of part you want.
- Take a small black or clear rubber band and wrap the rubber band to the base as close to your scalp as possible.
- Being sure not pop the rubber band or wrap to tightly on your hair.
- Fold your braiding hair in half, placing the loop end on the rubber band part.
- Braiding in the motion of taking your left strand, placing it under your natural hair, repeating the same motion with your right strand and back again.
- Be sure you have a good grip on your hair, as you want it to be a neat process.
4Rubber Band Method #2 (Crochet Method)

- Following the same method as the rubber band method #1, but instead of adding the braiding hair directly to your head your will take a crochet hook, being sure your crochet hook is designed for hair use.
- Fold the braiding hair in half and place the loop end on your crochet hook.
- Insert the crochet hook, under the rubber band, and out on the other side, remove your hook but leave the hair like it is.
- Pull on side of the braiding hair completely threw, being sure the other strand stays in place, once it’s completely thrown re-center the braiding hair so that both sides are even in length.
- Now you can begin the plaiting stage.
5Wrap and Braid Method

- This method is more widely known and used by professional hair stylist.
- Take your parted section and split it into two separate strands.
- Now take your braiding hair and separate that into two separate strands as well.
- Fold one strand in half and place the braiding hair directly over the center of the other one, checking to make sure everything is even. You should have formed a “T”.
- With the intersection part of the synthetic hair place it directly in between your natural hair strands.
- Join the left strand of your natural hair with the left strand of the braiding hair, by twisting them gently together, repeat the same process for the right strand.
- The strand in the middle should be the strand of braiding hair that is folded in half.
- Once you feel as though you have a good grip on your hair, you can start the braiding process, being sure to work tightly at the beginning to prevent the hair from sliding.
6Basket Weave Method
- Despite this technique being more commonly used with other crochet braiding styles, this is much easier and great for beginners.
- Plait a small section of your hair, being sure it’s braided loosely.
- Take your braiding hair and using a pencil or stick, plait the braiding hair, all the way until the end.
- Remove the synthetic hair from the stick, and insert the looped end, on your crochet hook.
- Take your crochet hook into your hair directly under your natural hair plait.
- Once threw you can remove your crochet hook, don’t pull the hair completely threw, about 3-4 inches should be enough.
- Take the tail end of the synthetic hair and insert it in to the loop, now you can gently pull the tail end completely threw, being sure its tight enough but not to tight that it can damage your hair.
- Once threw your can take your natural hair and hook the end on the crochet hook, and in a basket weaving motion, basket weave in between the stiches of the synthetic plait, to basically hid it.
7Ombre Box Braiding
- Once you have chosen your preferred starting method and have all the tools needed on hand, you are all ready to begin braiding your hair.
- Take your rat tail comb and part your hair straight down the middle, of your head from your forehead to the nape of your neck, being sure your part is clean, straight and neat.
- Follow the same process again, but this time you are going from the top of one ear to the top of the next. You should have four separate sections, this will allow a much fast process when doing your hair. Clip three of your sections up and out of the way, to avoid grabbing any extra hair. With the remain section you can add a small amount of leave in conditioner to your hair, once done you can start parting your hair. If you are a beginner or would like something simple, part your hair into 1-inch sections, (for bigger braids your part should be 2 inches).
- With your chosen braiding method, you can start braiding your hair, for beginners rubber band method #1 would be best. Take a small black rubber band and wrap it around your parted section, making sure its as close and tight to your head as possible, just be sure its not to tight, we don’t want to damage our hair in the process.
8Ombre Box Braiding #2

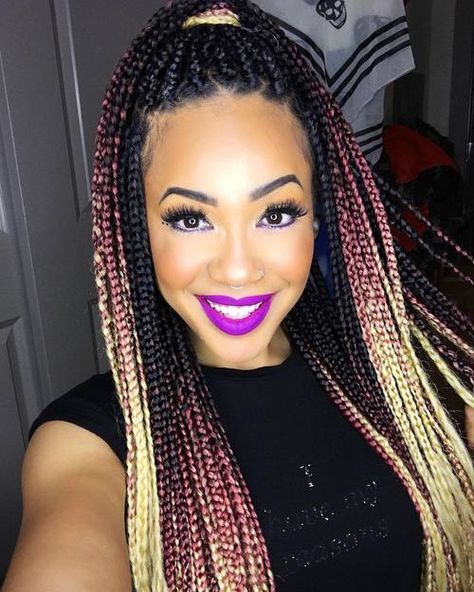
Since we have chosen to go with Rubberband method #1, then you can continue parting and rubber banding your entire section that you left out. If not, you can just work one part at a time. Follow the appropriate steps to starting the braid. For the individuals who would like a brighter more colorful ombre effect and choose to use a color like yellow fading into green, you may want to check out a video on how to do the tucking method to give your overall look a much neater and professional appearance. For the ends you can take a pair of scissors and cut gently upward to remove some of the extra hair to make the ends smaller and thinner. You may also tease and stretch the braiding hair at the beginning before you start, so your ends will already be uneven and good to go. Having your ends uneven is best because the hair is less likely to unravel.
Once you have done the first section of your hair, continue the same process with the other sections. Being sure apply leave in conditioner before braiding and if need apply more hydrating cream to hair to help tame flyaway. When all of your hair is completely braided, you may take some hot water and dip your ends into the water for 5-10 seconds, be careful not to burn yourself in the process. Once done you can lay your edges and also apply a mouse to your braids to add shine to it.


